VirtualSite: overlay Matterport scan on Google Maps (using drag and drop)
/ Veriscian/ Support TeamThe ability to overlay Matterport scans on Google Maps is a new feature for the VirtualSite platform. We provide users with two alternative methods to do this;
- Align using Point Pairs: more accurate but slower process (see overlay Matterport scan on Google Maps using point pairs for more info).
- Align using Drag and Drop: much simpler and faster using our new drag and drop tool (see below)
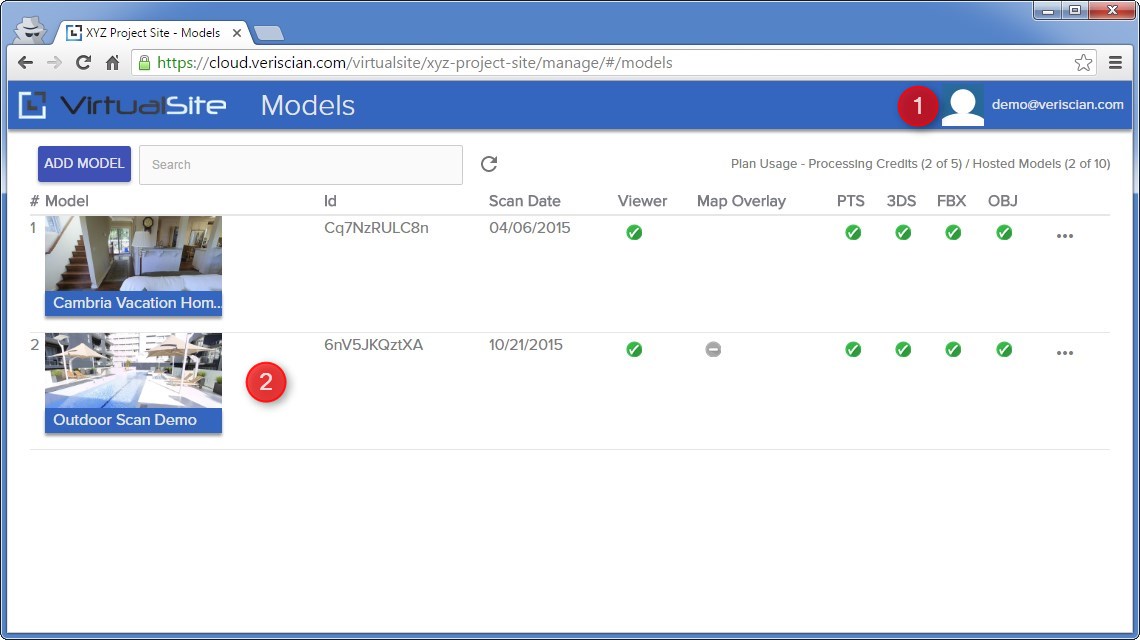
Steps 1 - 2
1) Log into your site and navigate to your "Models" page. You can get to your "Models" page by selecting the drop down menu at the top right of the page and choosing "Models".
2) Locate the model you wish to overlay on Google Maps from the list. To be able to overlay your Matterport scan on Google Maps you must have first added it to your site and with any initial processing complete (see adding a Matterport scan to a site).
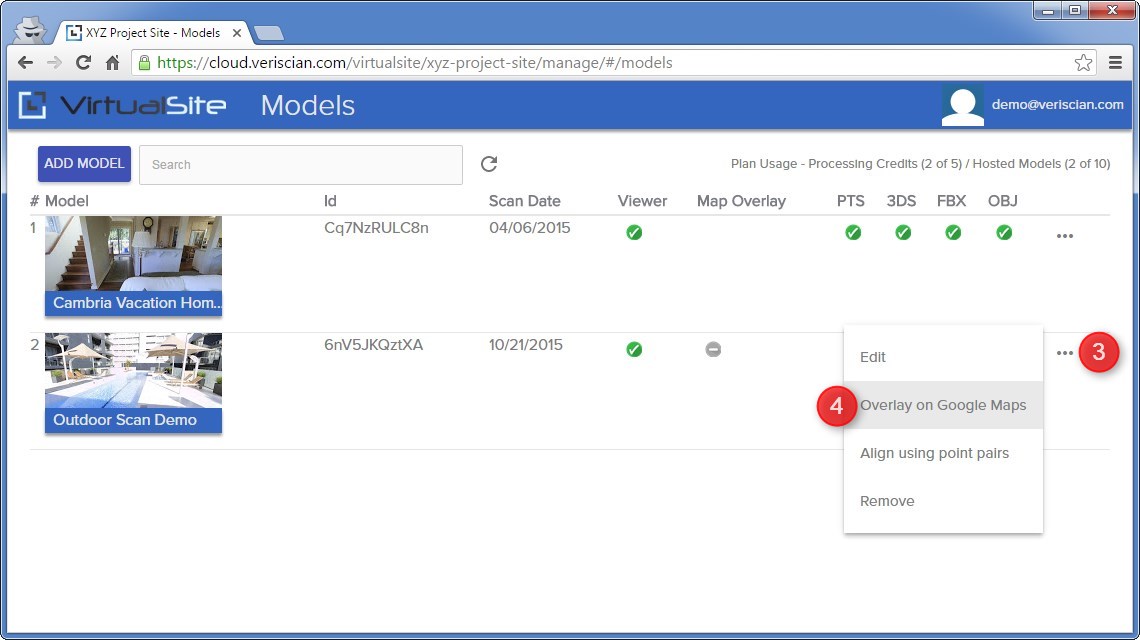
Steps 3 - 4
3) Select the "More options" button (three dots) for your chosen Matterport scan to reveal a menu.
4) Select "Overlay on Google Maps" from the options menu.
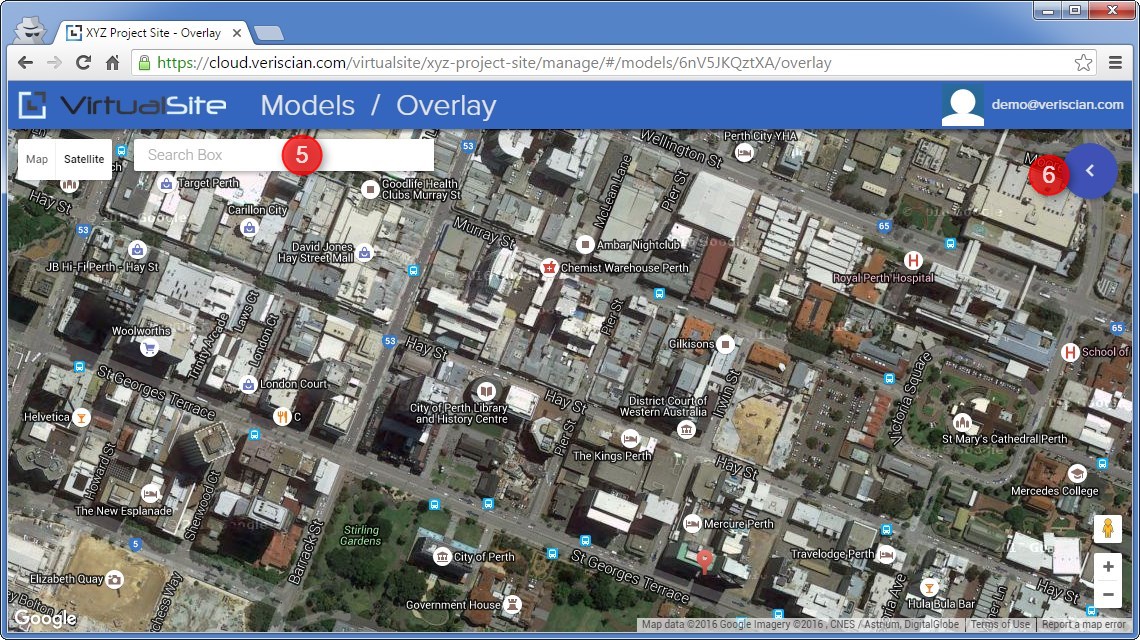
Steps 5 - 6
5) Using the search box, navigate to the location corresponding to your chosen Matterport scan.
6) Select the blue arrow button in the top right corner of the map to reveal a side panel with additional options.
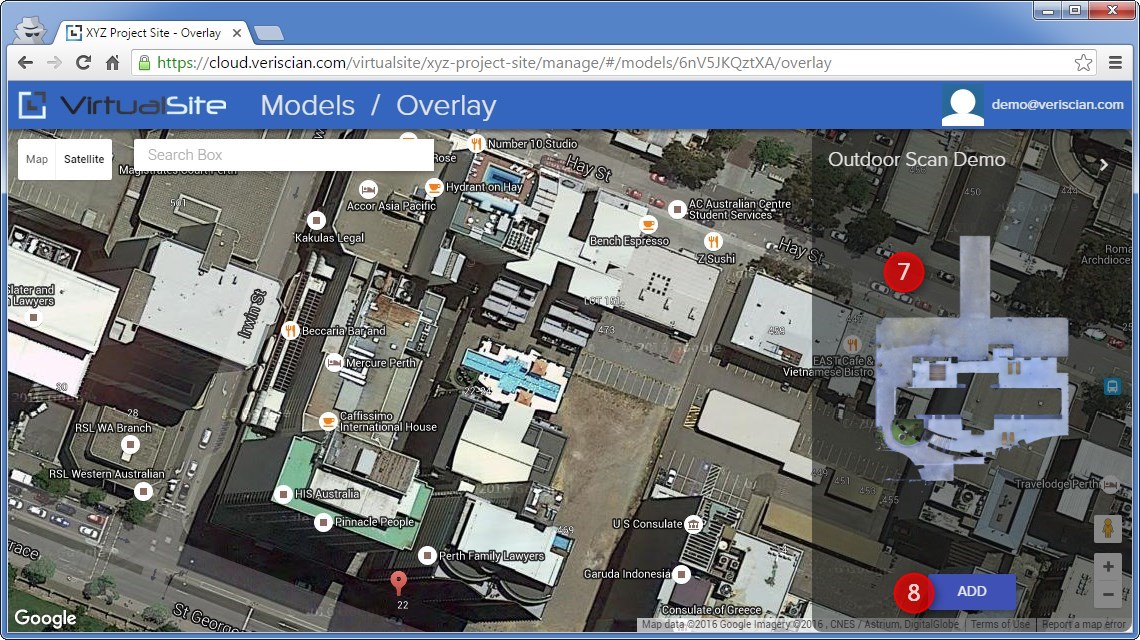
Steps 7 - 8
7) A floorplan view will appear in the side panel. If this is the first time you have overlayed this scan it might take up to 30 seconds to render. While the floorplan is loading, you will see a message saying "Preparing" with a loading icon. If it takes more than 30 seconds to load, refresh the page to restart.
8) Select the "Add" button to add the floorplan to the map.
Steps 9 - 13
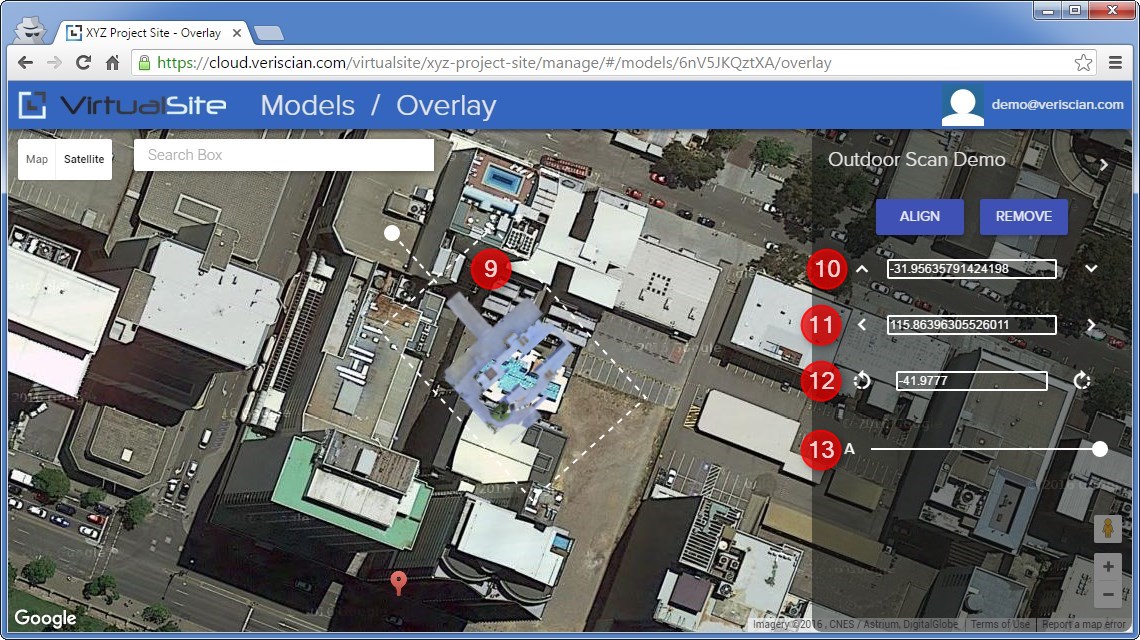
9) Select the floorplan overlay to highlight it with a white dashed box. Select and drag the floorplan overlay to the desired location on the map. Select and drag the small white circle (along the top edge of the dashed white box) to rotate the floorplan. When the floorplan overlay is selected, the side panel will display additional options that allow you to finely adjust the position, rotation and transparency of the overlay.
10) Latitude: finely adjust latitude of the overlay using the up and down buttons or manually input a value in degrees.
11) Longitude: finely adjust longitude of the overlay using the left and right buttons or manually input a value in degrees.
12) Rotation: finely adjust rotation of the overlay using the clockwise and counter-clockwise buttons or manually input a value in degrees.
13) Transparency: use the slider to adjust the transparency of the overlay. This can be a helpful tool when positioning to allow you to align with feature points on the map that would otherwise be hidden by the overlay. Please note, this does not change the transparency of the final Google maps overlay it is only a tool to help with aligning the overlay.
Steps 14 - 15
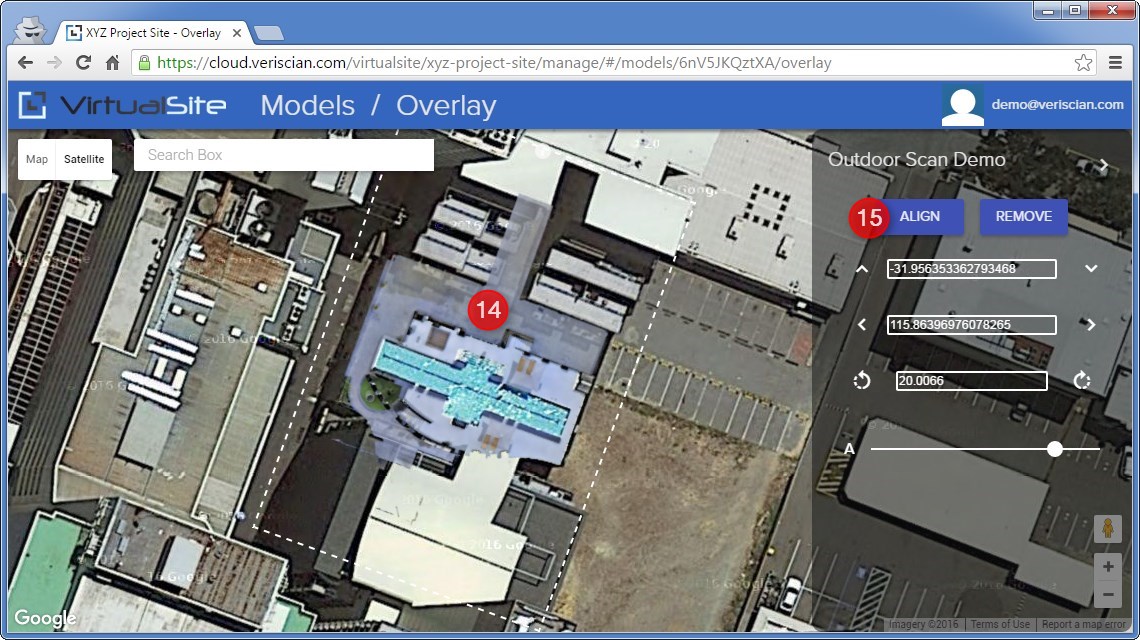
14) Adjust position and rotation until the overlay is in the desired location.
15) Once you are happy with the location, select "Align" to start the processing. Once processing has started, you will be automatically redirected back to your "Models" page.
Step 16
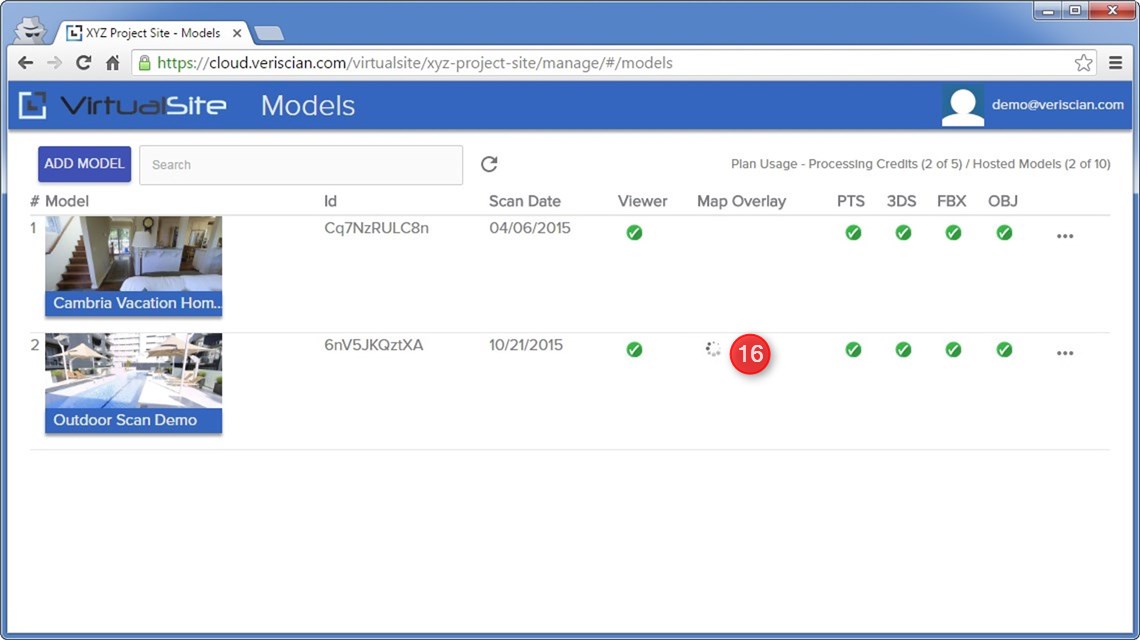
16) While your scan is being processed, you will see a loading icon in the "Map Overlay" column. Processing typically takes around 15mins.
Step 17
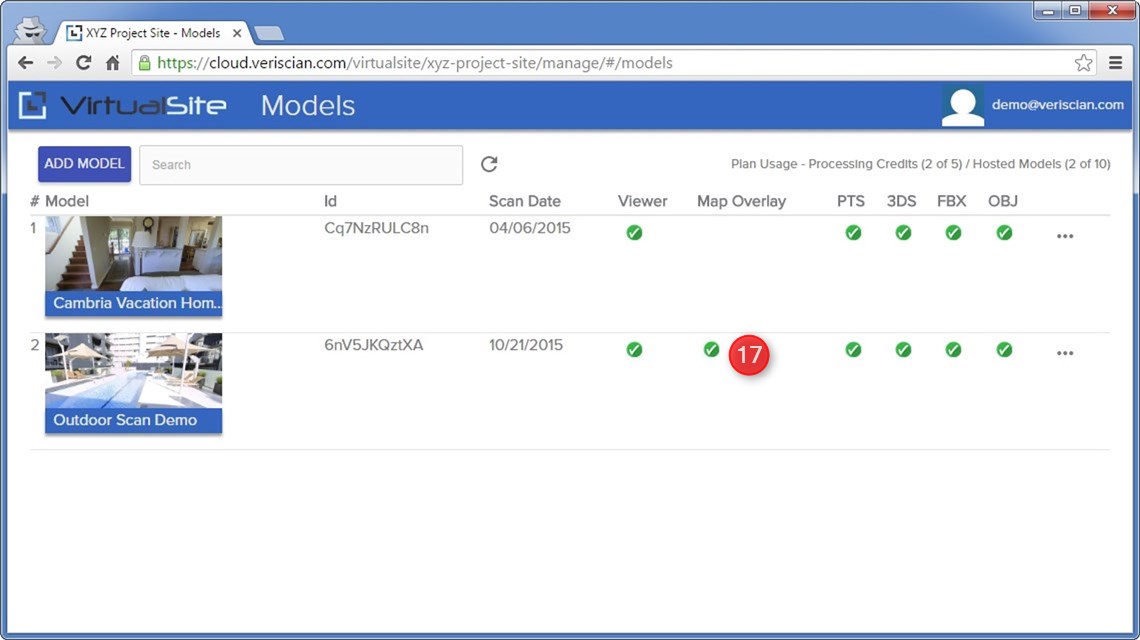
17) Once complete, the loading icon will change to a "tick" and your Matterport scan will now be overlaid on Google Maps.

