Index raw point cloud using Autodesk Recap
/ Veriscian/ Support TeamNote: requires a copy of Autodesk ReCap 2016 to be installed. This can be downloaded for free from the Autodesk website by following these steps.
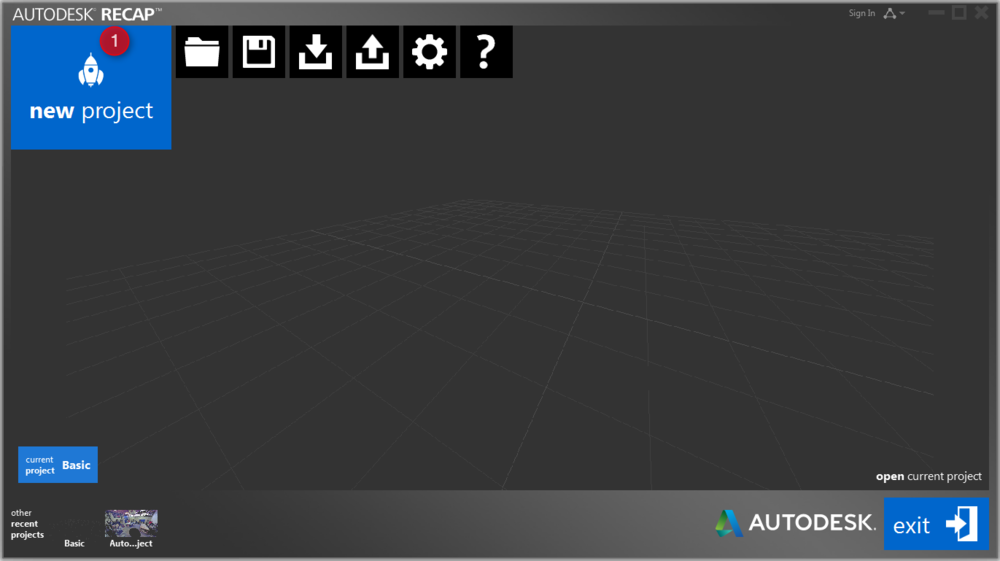
Step 1
1) Open Autodesk ReCap 2016 and select "new project"
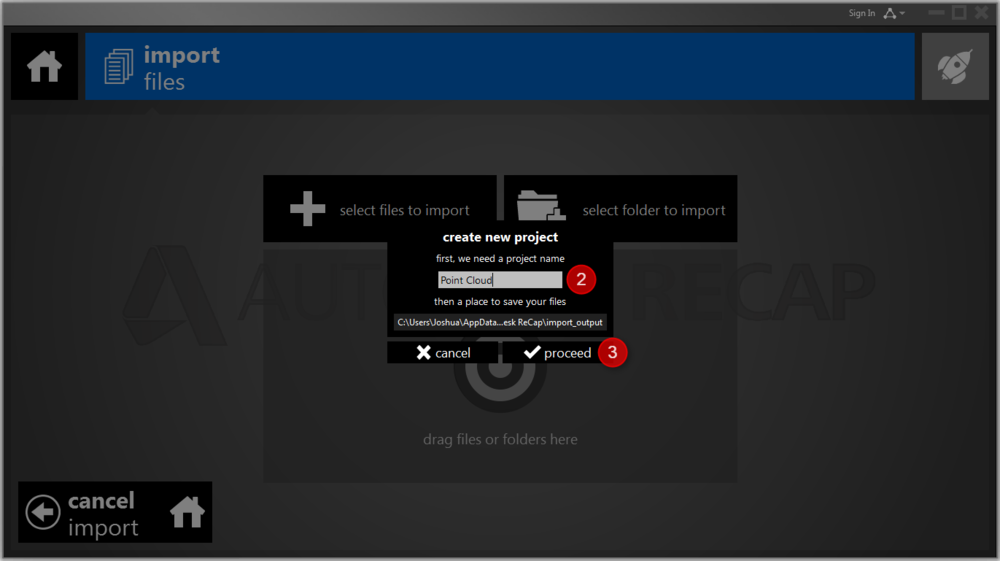
Step 2 - 3
2) Input a name for the new project
3) Select proceed to finish creating new project
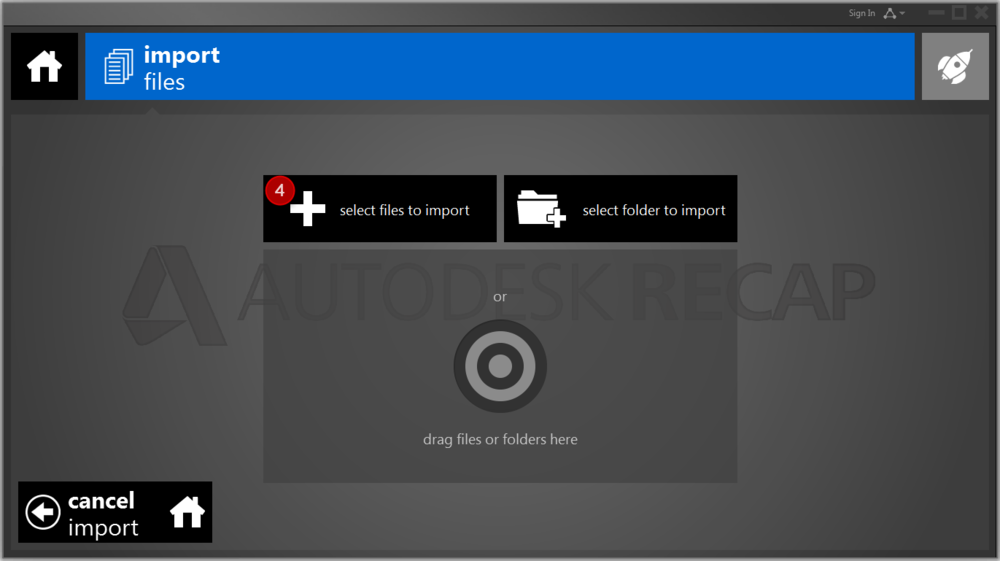
Step 4
4) Select the "select files to import" button
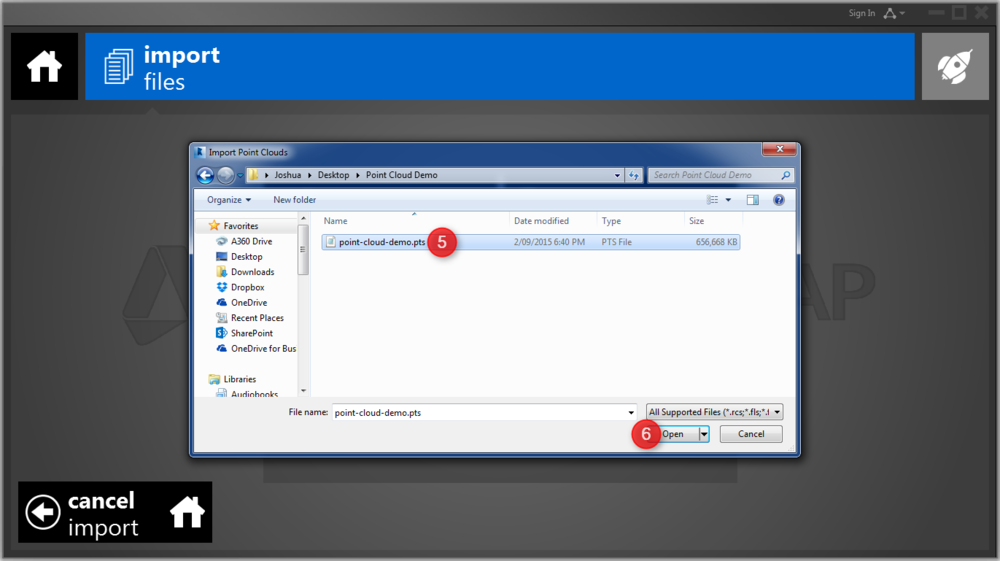
Step 5 - 6
5) Navigate to the raw point cloud file in windows explorer. A copy of the raw point cloud for a site can be downloaded from the VirtualSite portal. It will have a ".pts" file extension.
6) Select "open" to finish importing
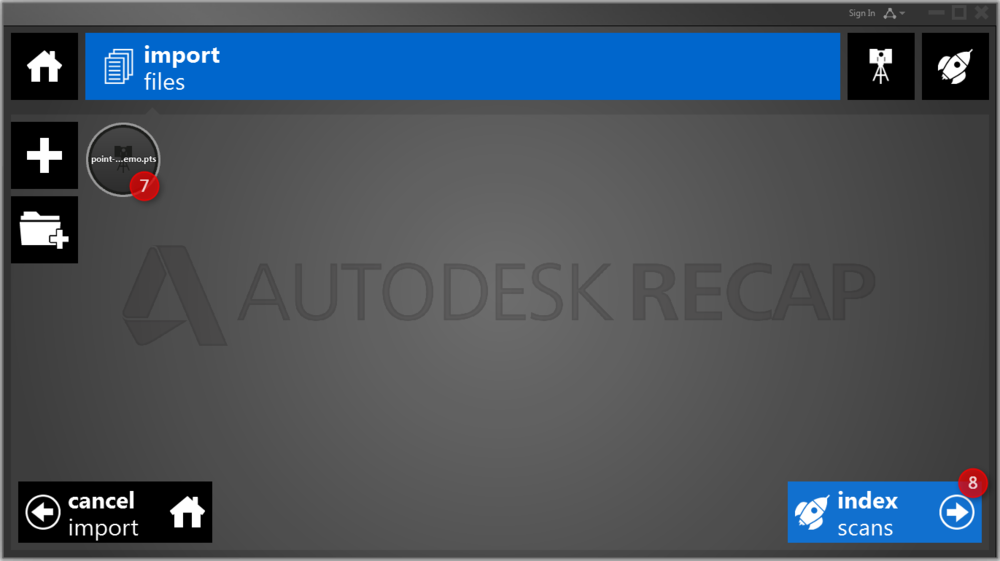
Step 7 - 8
7) The raw point cloud should now appear in your project
8) Select "index scans" to start the indexing process. Indexing is a process of reading the raw point cloud and converting it into a proprietary Autodesk format that is necessary to be able to import point clouds into most Autodesk software.
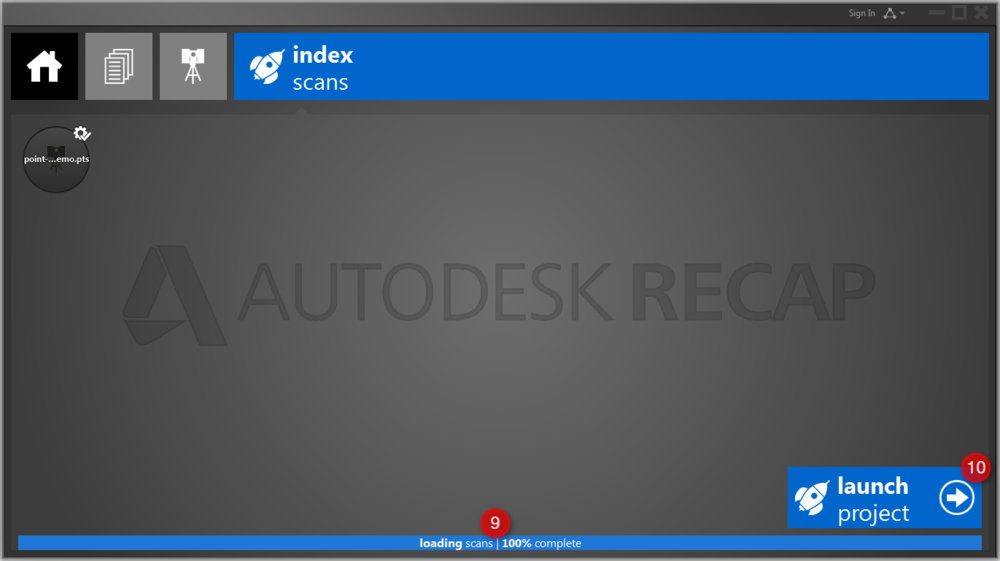
Step 9 - 10
9) Depending on how large the point cloud is, the indexing process will take some time to complete.
10) Once indexing is complete, select "launch project" to open the point cloud
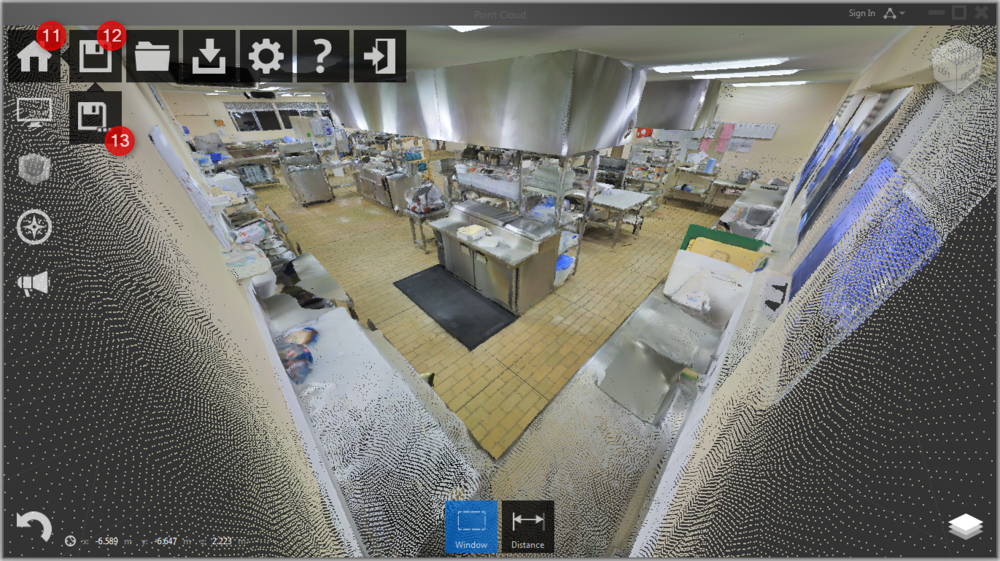
Step 11 - 13
11) Hover over the "Home" icon to make a tray of more options appear.
12) Hover over the "Save" icon to make a tray of more options appear
13) Select the "Save As" icon
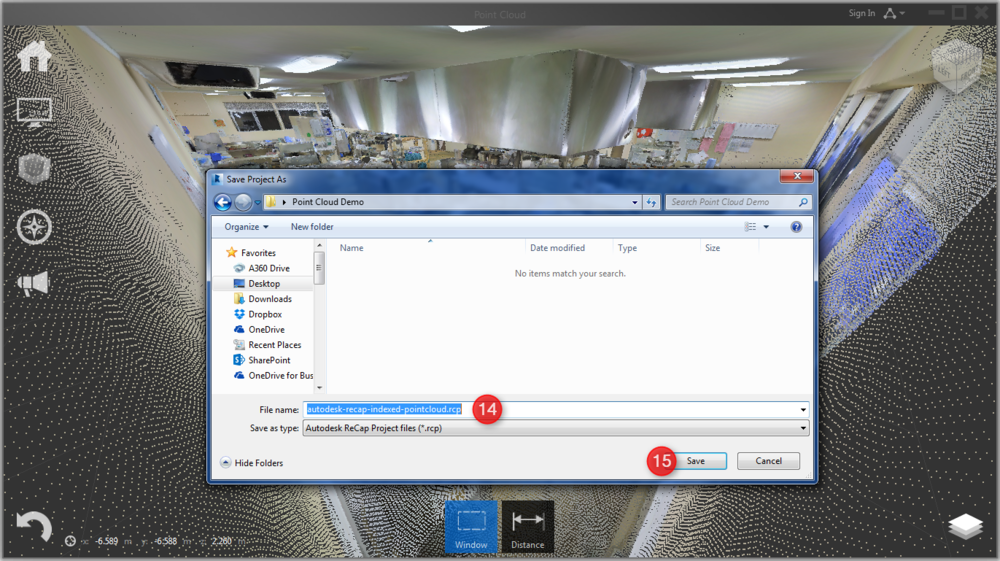
Step 14 - 15
14) Navigate to the location you want to save your project in windows explorer and input a name to save it as.
15) Select "Save" to save the project
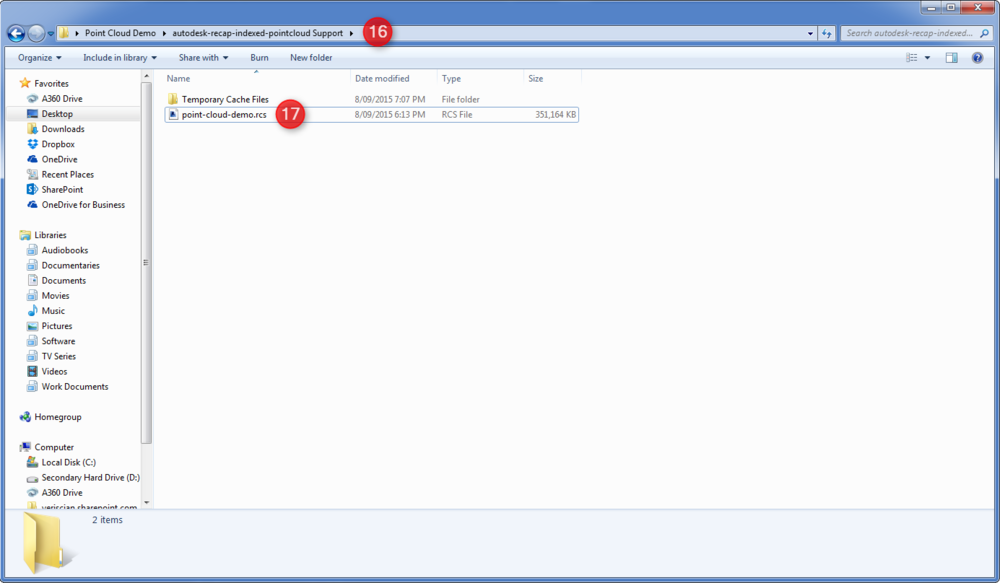
Step 16 - 17
16) Open windows explorer and navigate to the location that the project was saved.
17) Find the indexed point cloud file that ends with ".rcs". This is your final indexed point cloud that can be imported into Revit/AutoCAD.

