VirtualSite: create a new project site
/ Veriscian/ Support Team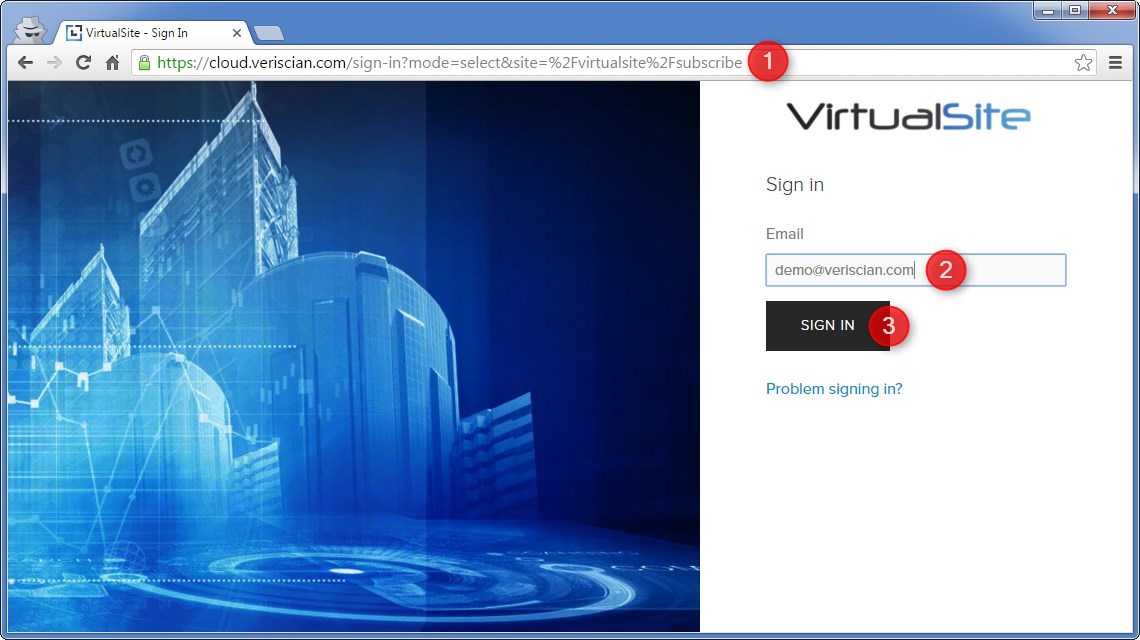
Steps 1 - 3
1) Open browser and navigate to https://cloud.veriscian.com/virtualsite/subscribe. Users must be signed-in to create
a new site. If you are a new user (or not logged in) you will be redirected to the sign-in page.
2) Enter your email address. For new users this can be any email address you wish to sign up with. For users already
registered, you must use the email address you registered with.
3) Select "Sign In"
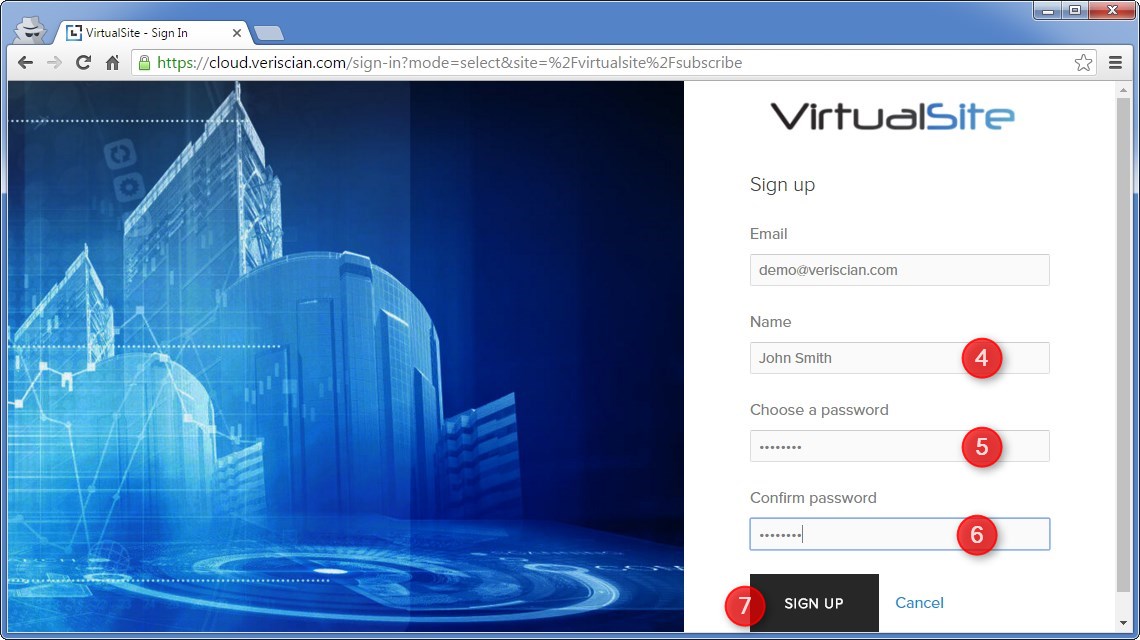
Steps 4 - 7
4) New users will be prompted to input their name.
5) Choose a password.
6) Enter your chosen password again to confirm.
7) Select "Sign Up".
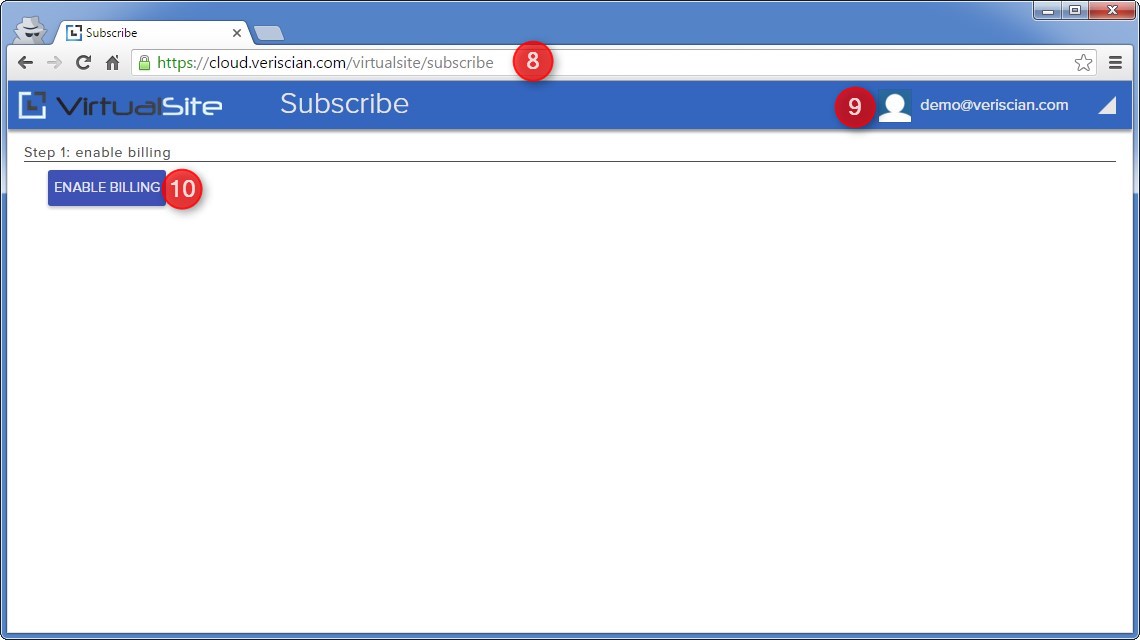
Steps 8 - 10
8) You will be redirected back to the subscribe page to setup your new site.
9) If sign up was successful, you should now be logged in with your email address appearing in the top right corner.
10) To setup a new site, you must enable billing. Select the "enable billing" button to register your billing details.
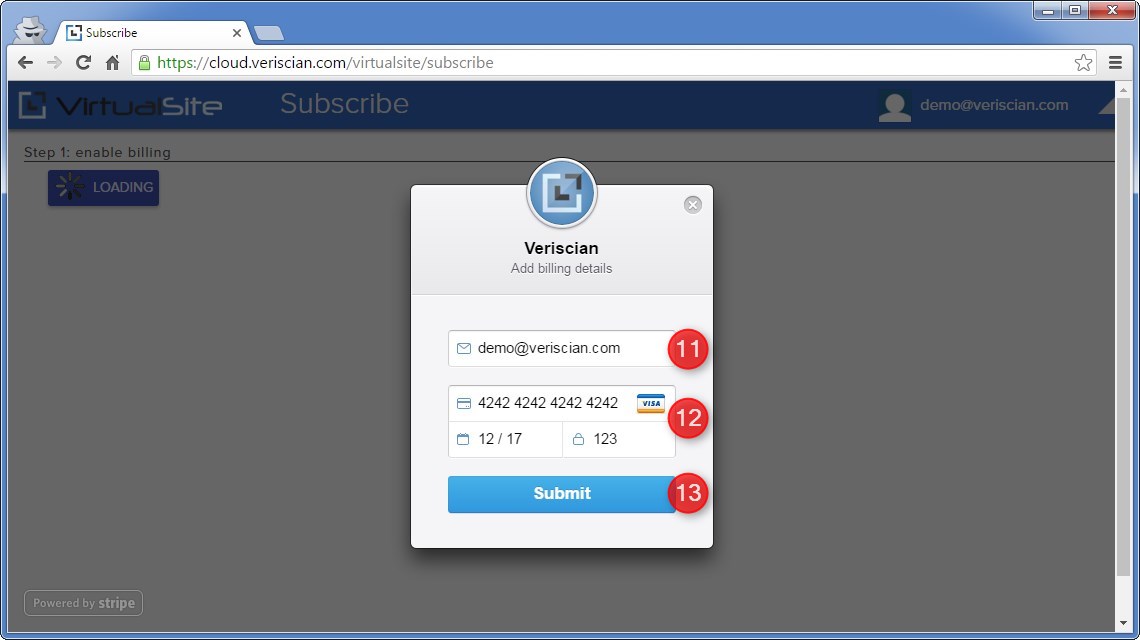
Steps 11 - 13
11) A new window will appear for you to input your billing details. Please note, doing this will not charge anything yet. This will just save your details to your account you are currently logged in with. To get started, enter your email address for billing (this address will be used for sending any receipts).
12) Enter credit card details including credit card number, card expiry date and access code.
13) Select "Submit" to save your details.
Steps 14 - 16
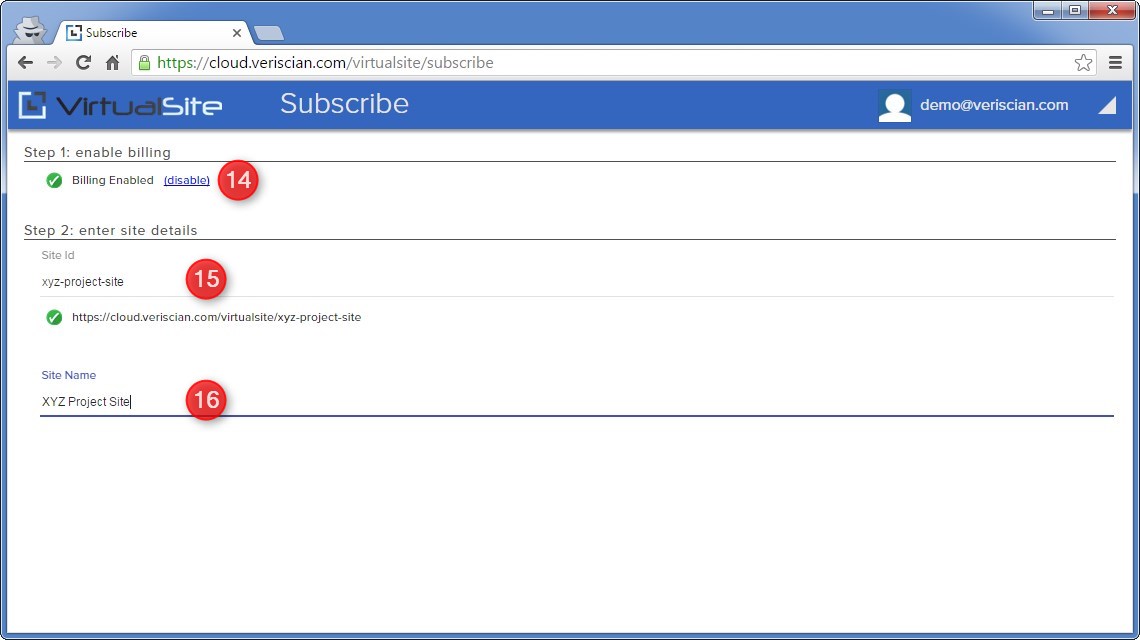
14) If your details were successfully saved, you should now see "billing enabled" appear at the top of the page. To clear or change your billing details, select disable and repeat the previous steps.
15) Input a site id relevant to your project. This is the primary identifier for your site and will become part of the URL you use to access the site. There are some restrictions on your site id such as; it must be unique (this is checked as you type), at least 5 characters long and limited to any combination of lowercase letters, numbers and dashes.
16) Input a name appropriate for your site. There are no restrictions on this, it will appear in the header of the site.
Steps 17 - 19
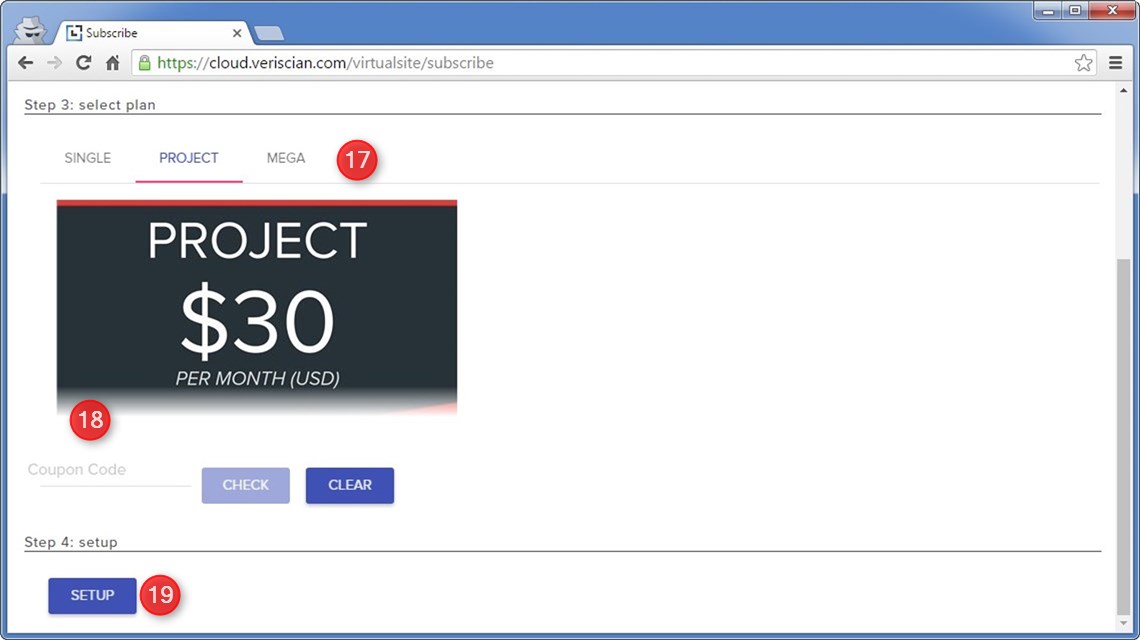
17) Choose a plan appropriate to your project. You can read more about the available subscription plans on http://www.veriscian.com/for-matterport-users/#pricing . It is also possible to expand details on each plan type by selecting the plan image.
18) If you have a coupon or promo code, select "APPLY COUPON CODE" to reveal a new form field. Type or paste the coupon/promo code and select the "Check" button to verify the code. If the code is valid, you will receive a message confirming that the coupon/promo code has been applied to your new site setup.
19) Select "Setup" to create your new site. This will take a few seconds to process, in this time you will a) be charged for your first month of the subscription using the billing details you entered previously (unless you are signing up for a trial period in which case you will receive a $0.00 charge), b) your new site will be setup.
Step 20
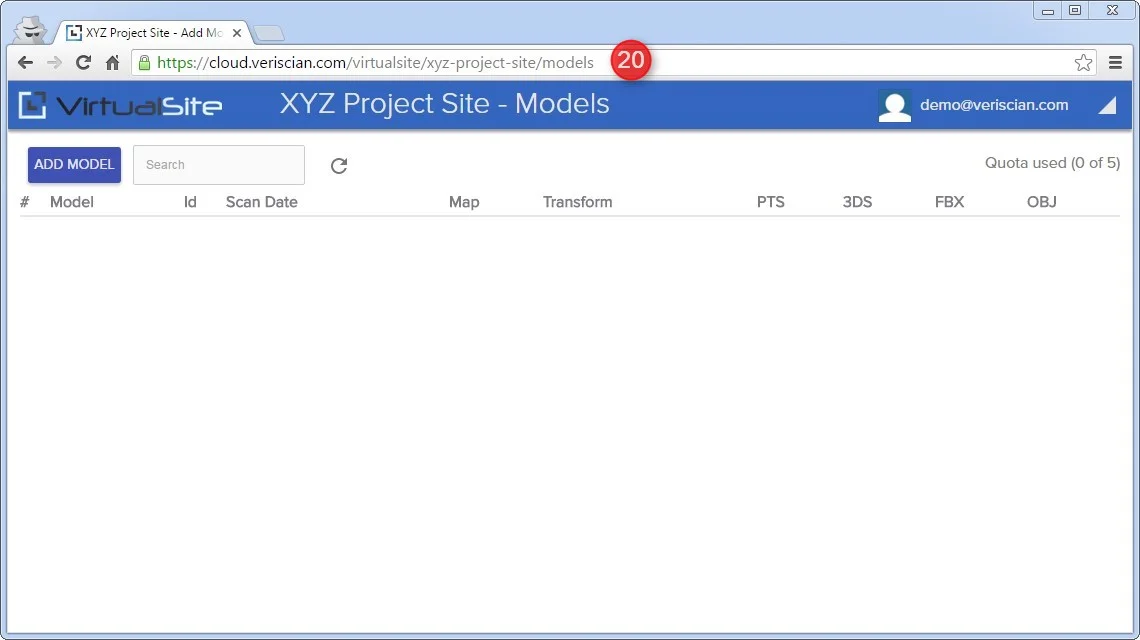
20) If setup was successful, you will be redirected to the "model" page of your new site so you can get started. From here you will be able to start adding Matterport scans to your site.

